Sunday, December 28, 2014

Stainless Steel Cookware

When I first started cooking, I used traditional non-stick cookware. I never thought about using other cookware, because non-stick is the easiest to use and clean. However, I started getting paranoid about how poisonous toxic stuff was leaching into the food I cook (thanks to the stuff I read online). It sounded like it would become a health hazard in the long run.

Greg agreed with what I thought, so we replaced our cookware with this ceramic non-stick cookware set. Ceramic is not supposed to react with food, so it is safe to use. Unfortunately, this cookware set didn't last too long. In less than a year, there were tiny chips on the surface of a few of the pots and pans. I was worried that it may be harmful to cook with those, so we replaced the entire set with a stainless steel one.

I have been using the Cuisinart Chef's Classic Stainless Steel Cookware Set for six months now and I'm loving it! The cookware set includes 1 1/2-quart covered saucepan, 2 1/2-quart covered saucepan, 3-quart covered saute pan, 8-quart covered stockpot, 8" open skillet, 10" open skillet and 18 cm steamer insert. These are more than sufficient for a beginner in the kitchen. I have used everything except the stockpot because it's way too big. I use the 5.75-quart Dutch oven instead, when I make soups.

Truth be told, stainless steel is not the easiest type of cookware to use. If you don't use it correctly, you end up with food sticking to the pan and burnt food. It also requires careful cleaning, otherwise you get scratches on your cookware. However, I'm willing to overlook these minor inconveniences because this cookware set is safe to use and pretty to look at.

There is a trick to get food to NOT stick on your stainless steel pan. You need to make sure that the pan is hot enough before adding oil to it. Before I start cooking, I preheat the pan over medium heat to get it ready for the "mercury ball" test. It's a test where you sprinkle drops of water on the pan, and they form a ball that resembles a mercury ball. This can only be achieved when the pan is at the right temperature.


If the pan is not hot enough, the water droplets will sizzle and evaporate when they touch the pan. If that happens, you need to let the pan heat for a little longer and try again. Once the water droplets form a ball of water, you may wipe away the water and add oil to the pan. You also need to make sure that the food you're adding to the pan is not too cold. Let it sit out a little after you take it out from the fridge.

To prevent scratches on my cookware, I have been using this silicone turner for stir-frying and flipping food. The soft flexible material doesn't scratch the surface of my cookware. You definitely don't want to use anything made of metal on your cookware.

When it comes to cleaning stainless steel cookware, I find that the best thing to use is a cellulose sponge cloth. When I washed my brand new cookware the first time, I used a non-scratch dishwand, which is a really convenient tool for washing dishes and I love it. But it turned out to be not non-scratch on stainless steel and I ended up getting a lot of hairline scratches on my cookware. So I switched to a sponge cloth, which was so much gentler.

If you get white spots on your pots after boiling something, you can remove them by boiling water and some white vinegar.


For severe stains and discolorations, I discovered a cheap and good product that works wonders. It's called Bar Keepers Friend® Cleanser & Polish.


Just wet the pan, add some product on it, and rub it in using a wet sponge cloth. It will form some kind of paste. Rinse it off and your pan will look shiny and (almost) new again!

1. Dirty pan with stains and discoloration
2. Add some Bar Keepers Friend to pan.

3. Using wet sponge cloth, rub product into pan.
Rinse off.
4. Tadah!


It's even strong enough to remove awful stains like this:

Nasty burn stains 
Almost there... 
All clean!


Hope you found this post useful, especially if you're just starting to use stainless steel cookware!

Friday, October 3, 2014

Zucchini Brownies Recipe

Zucchini Brownies

After I'd stopped mistaking zucchini for cucumber (which I dislike), I tried some grilled zucchini and I really liked it.  I thought the only way to cook them and for them to taste good was to have them grilled.

One day, my mother-in-law gave me some zucchini. Well, actually it was quite a lot, so I thought I'd use some to make something. I remembered coming across zucchini brownies on Instagram. I googled for a recipe and found this. I think it is a really healthy recipe, since it's flourless and uses applesauce instead of oil. Unfortunately, I didn't have applesauce. I'm not sure how the brownies would have turned out if I'd followed the recipe exactly, but I like how mine came out - like a dense chocolate cake. Maybe you will too.


Zucchini Brownies Recipe 

Makes 16 squares


  • INGREDIENTS:

  • 1/4 cup creamy peanut butter
  • 2 tablespoons honey
    (Original recipe called for 1/4 cup.)
  • 1/4 cup canola oil
    (Original recipe called for 1/2 cup natural unsweetened applesauce, but I didn't have it.)
  • 1 teaspoon vanilla extract
  • 1 1/2 cups grated zucchini
  • 3/4 cup oats
  • 1/4 cup unsweetened cocoa powder
    (Original recipe called for 1/2 cup, but I found 1/4 cup to be sufficient.)
  • 1 teaspoon baking soda
  • 1/4 teaspoon salt
  • 1/2 cup dark chocolate chips, divided

DIRECTIONS:


STEP 1

Preheat oven to 350 degrees F. Line a 9 by 9 inch baking pan with parchment paper.


STEP 2

Process oats in a food processor until finely ground. Set aside.


STEP 3

In a large bowl, cream together peanut butter, honey, canola oil, and vanilla using a mixer. Add in zucchini, ground oats, cocoa powder, baking soda, and salt. Mix until well combined. Gently fold in 1/4 cup of chocolate chips. 


STEP 4

Pour batter into prepared baking pan. Sprinkle remaining 1/4 cup of chocolate chips on top. 


STEP 5

Bake for 25-30 minutes, or until toothpick inserted into middle comes out almost clean. Cool brownies completely and cut into 16 squares.

Tuesday, September 16, 2014

Broccoli Cheese Soup Recipe

Broccoli Cheese Soup

I love soup, especially when it's cold outside. But for some reason, I don't make it often. I believe I have made soup only five times in the past year, and only two kinds. Broccoli cheese soup is one. The other is ABC soup, which is made with chicken, carrots, potatoes and tomatoes.

I like to tell myself that this soup is healthy because of the broccoli and carrots. But it's actually somewhat sinful because of the butter, half & half, and cheese. I ended up making substitutions, so I won't feel so guilty when I'm eating it. Despite the lower fat content, the taste and texture of the soup are still good.

I got the original broccoli cheese soup recipe here.


Broccoli Cheese Soup Recipe 

Makes 4 bowls


  • INGREDIENTS:

  • 1 tablespoon butter
  • 1/2 medium onion, chopped
  • 1/4 cup butter
  • 1/4 cup flour
  • 1 cup half & half + 1 cup skim milk
    (I substituted half of the half & half with milk, in order to reduce fat and calories.)
  • 2 cups chicken stock
    (I used low sodium.)
  • 1/2 lb fresh broccoli, chopped
  • 1 cup julienned carrots
  • 8 oz shredded sharp cheddar cheese
    (I used reduced fat.)
  • 1/4 teaspoon nutmeg
  • salt and pepper, to taste

DIRECTIONS:


STEP 1

In a small skillet, melt butter and sauté onion until softened. Set aside. 


STEP 2

In a large pot, melt butter over medium heat. Add the flour. Use a whisk to stir the flour constantly, breaking up any lumps and distributing it evenly through the melted butter. Cook for 5 - 7 minutes.


STEP 3

Add half & half, milk and chicken stock. Stir everything together. Simmer on low heat for 20 minutes.


STEP 4

Add broccoli, carrots and reserved onion. Cook for 20 minutes.


STEP 5

Add cheese, stir and let it melt. Stir in nutmeg. Season with salt and pepper, if you wish. Turn off heat.


NOTES & TIPS:


If you would like to puree the soup, you could do it after step 4. I choose not to, because I like the little chunks of broccoli. Plus, it is too much trouble to transfer the soup to a blender/food processor. If you have an immersion blender, it would be a lot more convenient.

Friday, September 5, 2014

Peanut Butter Banana French Toast Recipe

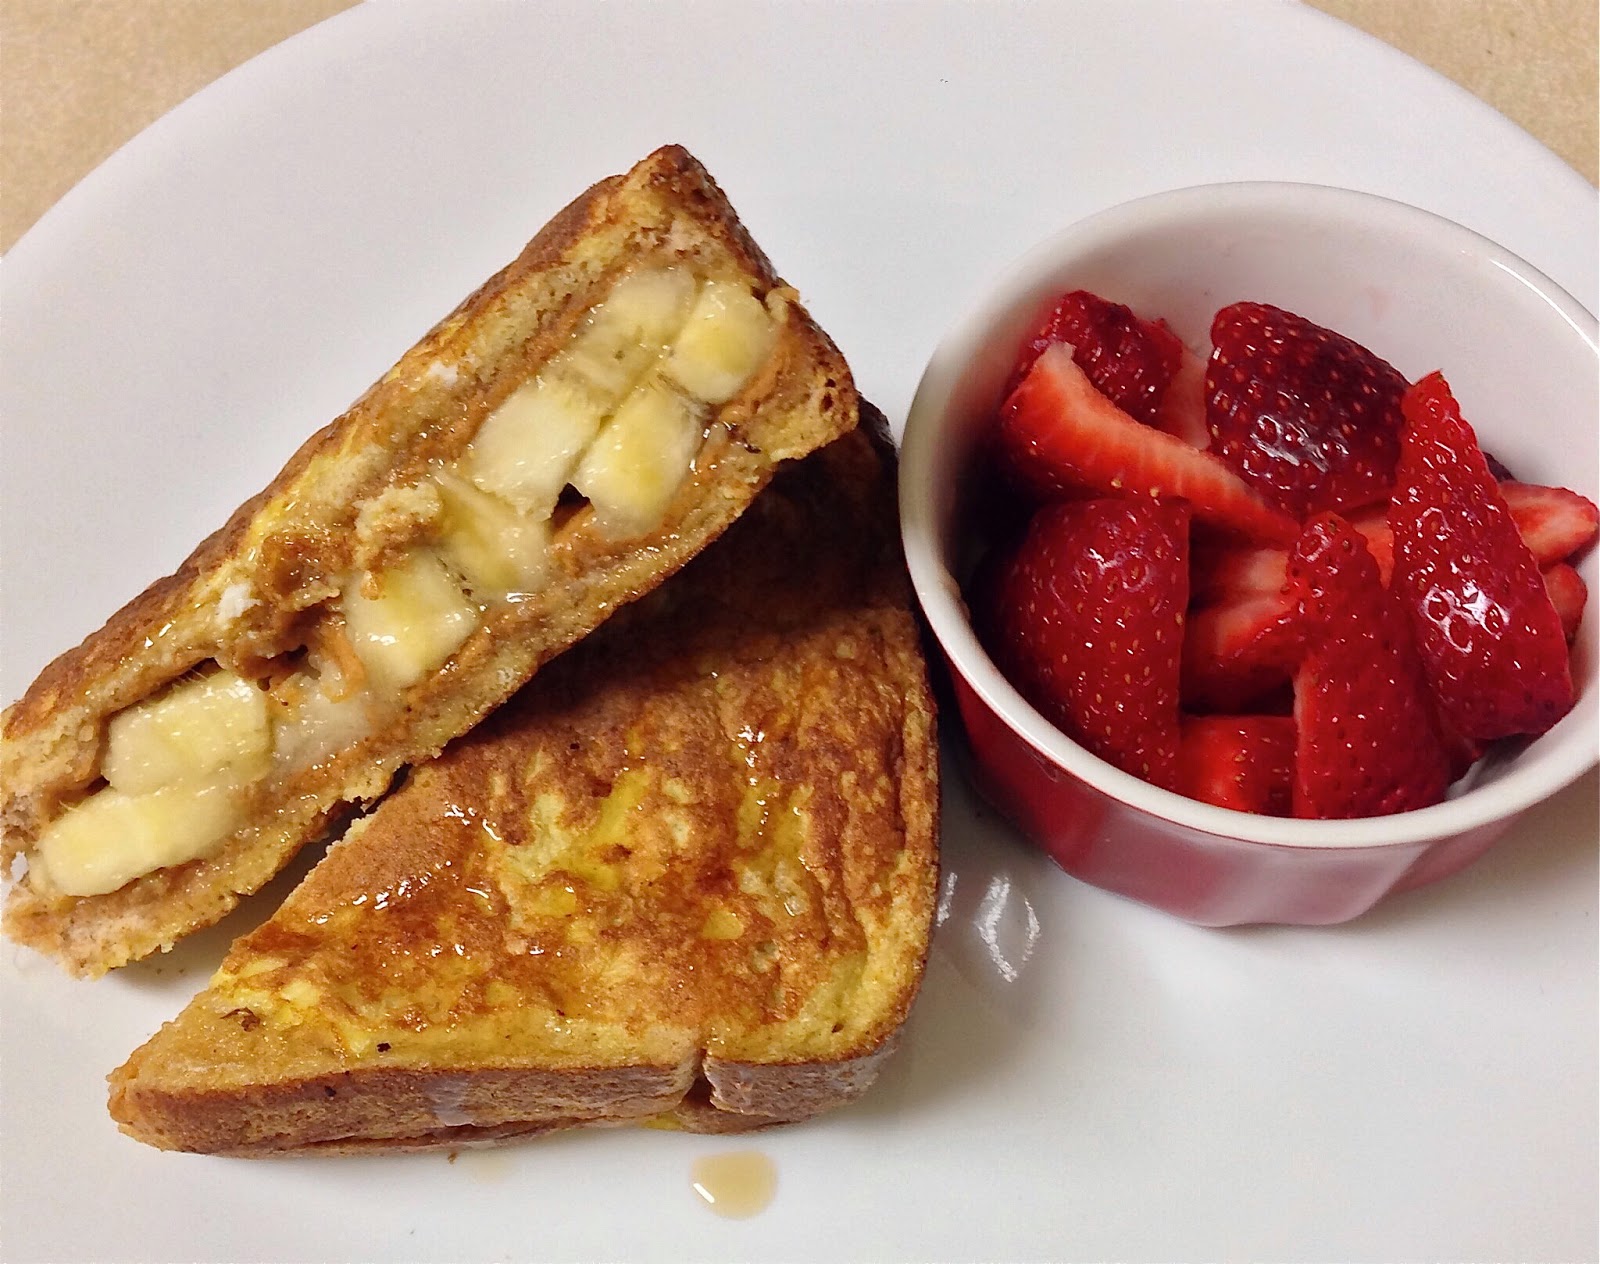
peanut butter banana french toast
Peanut Butter Banana French Toast

I am not a fan of bananas. I don't like eating a banana by itself. But I love peanut butter. I can eat spoonfuls of it on its own. Put a banana and some peanut butter together, you get a wonderful snack. Put them in French toast, and you get a wonderful breakfast!

I added a side of strawberries, but you probably should not do that if you're watching your sugar intake. The banana and maple syrup are high in sugar.


Peanut Butter Banana French Toast Recipe

Makes 1 sandwich, serves 1


  • INGREDIENTS:

  • 2 slices bread
    (I used whole grain.)
  • 1 to 2 tablespoons creamy peanut butter
  • 1 ripe banana, peeled and sliced
  • 1 egg
  • A splash of vanilla extract 
  • Butter, for frying
  • Maple syrup, for serving

DIRECTIONS:


STEP 1

Spread peanut butter on both slices of bread. Place banana slices on top of first slice of bread. Place second slice of bread on top of the first.


STEP 2

Lightly beat egg and vanilla extract in a shallow bowl. 


STEP 3

Heat butter in a skillet over medium heat until it sizzles. Dip entire sandwich into the egg mixture. Place sandwich in skillet and cook until golden brown on both sides. Remove from skillet and cut into half diagonally. Serve warm with maple syrup.

Wednesday, September 3, 2014

Chili Recipe

chili recipe
All-American Chili

In Singapore, chili usually refers to spicy chili peppers, or a condiment that accompanies pretty much anything and everything. But in the US, mention chili and the first thing that comes to mind is a bowl of spicy stew. The only American style chili that I had in Singapore was chili cheese fries from Carl's Jr., which I thought was so-so. Then one day, I tried the chili at Red Robin here. I fell in love with chili.

Greg and I were out grocery shopping one day, and we had the idea to make chili for dinner. So he called his mom and asked her for her recipe. We took down the list of ingredients and directions over the phone. The recipe sounded simple, and indeed, it was. I halved the recipe as there was only the two of us. I also modified it a little by adding two more ingredients: garlic and cumin, which enhanced the flavor of the chili.

This chili is perfect for rainy days, cold days, and just about any other day.

chili recipe
It's good even on its own

Chili Recipe 

Makes about 4 bowls


  • INGREDIENTS:

  • 1 teaspoon olive oil
  • 1 clove garlic, minced
  • 1 medium onion, chopped
  • 1 lb ground beef
    (I like to use 93% lean 7% fat to reduce some calories.)
  • 1 can (14.5 oz) stewed tomatoes 
  • 1 can (15 oz) tomato sauce
  • 1 can (15.5 oz) dark red kidney beans, drained
  • 1 tablespoon chili powder
  • 2 teaspoons ground cumin
  • 1/2 tablespoon corn starch + water for thickening (optional)
  • Shredded sharp cheddar cheese, for serving

DIRECTIONS:


STEP 1

Heat olive oil in a large pot or Dutch oven over medium heat. Add garlic and onion to the pot, and cook until lightly browned, stirring frequently. Then add ground beef, and break it into pieces using a wooden or heat resistant spoon. Cook until browned, stirring occasionally. 


STEP 2

Pour in tomato sauce, stewed tomatoes, and beans. Add chili powder and cumin. Stir everything together well. Cover and reduce heat to low. Simmer for 1 hour, stirring occasionally. 


STEP 3

After 1 hour, check the consistency of the chili. If it is at desired consistency, turn off heat. If it is not thick enough, stir in corn starch mixture. Let it thicken before turning off heat. 


STEP 4

Serve with cheddar cheese.


NOTES & TIPS:


If you are watching your sodium intake, you can control the sodium by using no salt added tomato sauce, stewed tomatoes and beans. After the chili has simmered, taste it, and see if you need to add any salt. 

Sunday, August 31, 2014

Fluffy Pancake Recipe

fluffy pancake
Pancakes with a side of bacon

I love weekends. Greg doesn't have to work, so we get to spend some quality time together, and have breakfast together. Pancakes are our favorite breakfast food. I love making them and he likes eating them. We make a good team.

I've tried a few pancake recipes, but this one is my favorite so far. I got this pancake recipe from Allrecipes. The pancakes are moist, thick, and fluffy.

thick fluffy pancakes
Thick and fluffy pancakes

I made a couple of substitutions. Instead of regular milk, I used unsweetened almond milk. I also replaced sugar with stevia. With these two substitutions, the sugar went down to ZERO! Yay! This makes me feel less guilty about all that maple syrup that I drizzled on my pancakes.

That sexy syrup drizzle


Fluffy Pancake Recipe 

Makes 8 pancakes, serves 2


  • INGREDIENTS:

  • 3/4 cup unsweetened almond milk
    (Mine was vanilla flavored.)
  • 2 tablespoons white vinegar
  • 1 cup all-purpose flour
  • 1 teaspoon stevia
  • 1 teaspoon baking powder
  • 1/2 teaspoon baking soda
  • 1/4 tsp salt
    (I used less than what the original recipe calls for as I prefer less sodium.)
  • 1 egg
  • 2 tablespoons unsalted butter, melted
  • Cooking spray

Pancake ingredients
What you'll need

DIRECTIONS:


STEP 1

Combine almond milk and vinegar in a large bowl. Set aside for 5 minutes to "sour".


STEP 2

Combine flour, stevia, baking powder, baking soda, and salt in a medium bowl. Give it a quick whisk so everything is evenly mixed. 


STEP 3

Whisk egg and melted butter into prepared almond milk. Pour the dry ingredients into the wet ingredients, and whisk them together until most of the lumps are gone (I prefer not to over mix the batter).


STEP 4

Heat a large skillet over medium-low heat, and coat with cooking spray. Pour 1/4 cupfuls of batter onto the skillet, and cook until bubbles appear on the surface. Carefully flip pancakes with a spatula, and cook until browned on the other side.


NOTES & TIPS:


I use a cast iron skillet to cook my pancakes. The skillet can get really hot, so I prefer to use low to medium-low heat. When I use medium heat, the pancakes brown too much before they are flipped.

Saturday, August 30, 2014

My Mom's Cooking

It wasn't until the last couple of years that I took an interest in cooking. In Singapore, my mom rarely cooked meals so I didn't have an opportunity to really learn from her. But before I left for Alabama, she did teach me how to cook a few simple dishes, like fried rice, braised soy sauce chicken, and stir-fried vegetables.

Singapore home cooked food
The dishes we cooked together

While cooking these dishes with my mom, I realized that she wasn't following any recipe. And when I asked, she told me that she didn't need any. She could not give me the exact amounts of the ingredients either. She really did not use any measuring cups or spoons. She told me that she eyeballs everything, and that I should do the same.

It frustrated me because I wanted to cook the same dishes here in the US, and I wanted them to taste exactly like my mom's. For a beginner in the kitchen, it is essential to know the exact amount of each ingredient in a dish. Cooking without a recipe is almost impossible, well, for me at least. So, I had to turn to Google for recipes, of which none came close to tasting like my mom's food.

It seems difficult to find a whole lot of recipes for Singaporean home cooked dishes on the internet. I guess I'll have to wait until I get back to Singapore and watch my mom cook those dishes again, then figure out the measurements and make recipes.

I'm looking forward to eating some home cooked meals in Singapore! I really miss my mom's cooking. Hopefully, I'll be able to make those recipes and share them here.

Friday, August 29, 2014

Chicken Fajita Omelette Recipe

Chicken Fajita Omelette

Every time we go to IHOP, Greg would order the chicken fajita omelette. I would take a few bites from his plate, but never order one on my own as it is just too huge for me. The omelette is very delicious. However, it has a whopping 1,050 calories! That is way too many calories in one meal for me to handle. I HAD to make my own healthier version at home. Luckily, it wasn't too difficult to figure out how to make this.

I got the nutrition facts for IHOP's omelette off their website, and my healthier version with the help of MyFitnessPal app. Please note that I did not include the jalapeno and sour cream in the nutrition facts for mine.


Chicken Fajita OmeletteChicken Fajita Omelette
No prizes for guessing which one is IHOP's and which one is mine.


I could have further reduced the calories by replacing all 4 eggs with liquid egg substitute, but I like the taste of real eggs. So I only replaced 2 eggs with liquid egg whites, as that is what we usually have at home.

I'm happy with how my omelette turned out. It is much healthier with way fewer calories than IHOP's, but still tasty!


Chicken Fajita Omelette

Chicken Fajita Omelette Recipe (Inspired by IHOP)

Makes 1 omelette, serves 1


  • INGREDIENTS:

  • 1 1/2 teaspoons olive oil 
  • 1/4 cup diced onion
  • 1/4 cup diced green pepper
  • 1 small jalapeno, sliced (optional)
  • 4 oz boneless skinless chicken breast, cut into bite-sized pieces
  • 1/2 teaspoon fajita seasoning mix
    (Made my own using this recipe, salt omitted.)
  • 2 eggs + 1/3 cup liquid egg whites, beaten
  • 2 tablespoons reduced fat shredded cheese
    (I used sharp cheddar, you could use Mexican four cheese.)
  • 2 tablespoons salsa
    (I used Newman's Own Medium Salsa.)
  • Sour cream (optional)

Chicken Fajita Omelette Ingredients
What you'll need


DIRECTIONS:


STEP 1

Heat 1 teaspoon of olive  oil in a small skillet over medium heat. While the skillet is heating up, season chicken with fajita seasoning mix. Add onion, green pepper and jalapeno to skillet. Cook for 2 minutes, stirring frequently. 


STEP 2

Add seasoned chicken to skillet. Cook for 5 minutes, or until cooked through. Stir frequently. Set aside once done.


STEP 3

Heat 1/2 teaspoon of olive oil in a medium skillet over medium heat. Add egg mixture to skillet and reduce heat to low. Cook until egg mixture is set, but top is still slightly moist, about 2 minutes. Turn off heat.


STEP 4

Sprinkle cheese down the middle of the omelette. Place chicken and veggies on top of cheese. Loosen omelette with spatula. Fold one side over center, followed by the other side.


STEP 5

Carefully transfer omelette to a plate. Top with salsa. 


NOTES & TIPS:


If you're using a non-stick skillet, you could use the same medium skillet to cook everything. I use stainless steel cookware, so I prefer to use separate skillets as food sticks, and you want a clean surface when you're cooking the omelette.

Also, you could use cooking spray instead of oil. I don't use cooking spray on my stainless steel cookware as it supposedly leaves a residue that is hard to remove.

Wednesday, August 13, 2014

Hello there!

A year ago, I got married to a wonderful man and moved to Alabama from Singapore. I never thought I'd ever leave my country, but I did, and I ended up in a place completely different from where I'm from.

I have been a stay-at-home-wife since we got married, and I'm enjoying every moment of it. Thanks to my husband, Greg, I've learned to do laundry, run a dishwasher, and vacuum. Things I never got to do in Singapore.

In Singapore, I rarely had the chance to step into our kitchen at home because I was always "bumping heads" with my mom. Now that I'm in Alabama with access to my own kitchen, I have the opportunity to learn how to cook and bake (with the help of youtube)! Cooking seemed overwhelming at first, but over time I think I've become quite good at it.

I enjoy trying out recipes and modifying them to make them healthier when I can, without sacrificing taste. Greg, my biggest fan, is an NPC competitor and lives on a very strict diet, but he can still indulge in the things I make.

I will be posting my opinion on recipes that I have tried, how I've modified them, everything I've learned, and share tips with other beginners like myself.

Have a happy time in the kitchen!